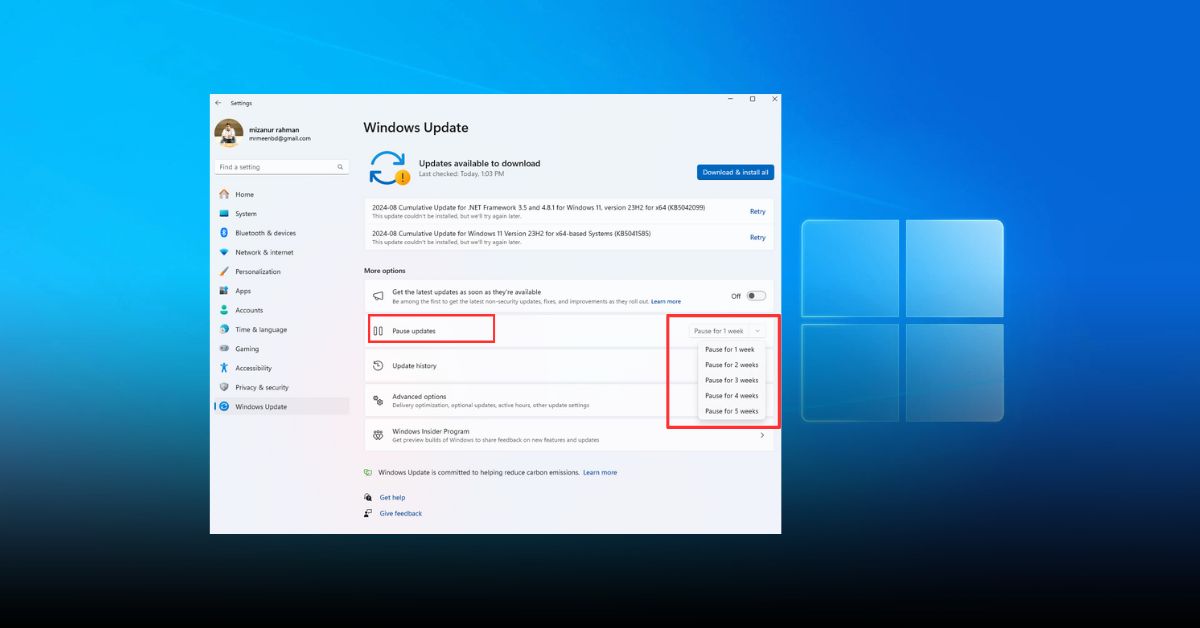
Windows updates are crucial for keeping your system secure and running smoothly, but they can sometimes be disruptive. Whether you’re tired of unexpected restarts, dealing with limited bandwidth, or simply prefer more control over your updates, this guide will show you how to disable Windows updates. We’ll walk you through the process step by step, ensuring you can easily manage your system’s updates.
Why Would You Want to Disable Windows Updates?
While Windows updates are essential for security and performance, there are valid reasons why you might want to disable them. For example, automatic updates can consume bandwidth, causing slow internet speeds. Some updates might introduce bugs or conflicts, which could disrupt your work. Finally, you might want to delay updates until you’re sure they’re stable. Whatever your reason, understanding how to disable Windows updates can give you more control over your computer.
How to Disable Windows Updates Using Settings
Disabling Windows updates through the Settings app is one of the simplest methods. This approach is best if you want a temporary solution.
Step 1: Access Windows Update Settings
To begin, click on the Start menu and select “Settings.” Next, navigate to “Update & Security” and then click on “Windows Update.” This is where you can manage how and when your PC installs updates.
Step 2: Pause Updates
Under the Windows Update section, you’ll see an option to pause updates. Click on “Pause updates for 7 days.” This feature allows you to stop updates for a short period, giving you time to decide on a more permanent solution.
Step 3: Adjust Active Hours
Another option is to adjust active hours, ensuring that updates only occur during times when you’re not using your computer. Click on “Change active hours” and set a time range that works for you.
How to Disable Windows Updates Using the Group Policy Editor
For those using Windows 10 Pro, the Group Policy Editor offers a more robust solution to disable Windows updates.
Step 1: Open the Group Policy Editor
Press Win + R to open the Run dialog box. Type gpedit.msc and press Enter. This will open the Group Policy Editor, where you can configure advanced system settings.
Step 2: Navigate to Windows Update Settings
In the Group Policy Editor, go to Computer Configuration > Administrative Templates > Windows Components > Windows Update. Here, you can access various settings related to Windows updates.
Step 3: Configure Automatic Updates
Double-click on “Configure Automatic Updates.” Select “Disabled” and click “Apply,” then “OK.” This action will prevent Windows from automatically downloading and installing updates.
How to Disable Windows Updates Using the Services Tool
Another method involves using the Services tool, which is available on all versions of Windows 10.
Step 1: Open the Services Tool
Press Win + R to open the Run dialog box. Type services.msc and press Enter. The Services window will appear, showing a list of all services running on your computer.
Step 2: Find the Windows Update Service
Scroll down the list until you find “Windows Update.” Right-click on it and select “Properties.” This will open a new window where you can manage how the service behaves.
Step 3: Disable the Service
In the Properties window, under the “Startup type” dropdown menu, select “Disabled.” Then, click “Apply” and “OK.” This will stop the Windows Update service from running, effectively disabling automatic updates.
How to Disable Windows Updates Permanently Using Registry Editor
If you’re comfortable working with the Windows Registry, this method offers a more permanent solution.
Step 1: Open the Registry Editor
Press Win + R, type regedit, and press Enter. The Registry Editor will open. Be careful when making changes here, as incorrect modifications can harm your system.
Step 2: Navigate to Windows Update Key
In the Registry Editor, navigate to HKEY_LOCAL_MACHINE\SOFTWARE\Policies\Microsoft\Windows\WindowsUpdate\AU. If the key doesn’t exist, you’ll need to create it manually.
Step 3: Create a New DWORD Value
Right-click in the right pane, select “New > DWORD (32-bit) Value,” and name it NoAutoUpdate. Double-click the new value and set it to 1. This action will disable automatic updates.
Conclusion
Knowing how to disable Windows updates gives you greater control over your PC, helping you avoid unwanted disruptions and maintain system performance. While it’s important to keep your system updated for security reasons, there are times when disabling updates temporarily or permanently may be necessary. Always remember to re-enable updates when you’re ready to ensure your system stays protected.


