Beat the heat and keep your kids cool and happy with these fun and delicious summer snacks! We’ve got a variety of choices, from refreshing frozen snacks to healthful nibbles ideal for on-the-go activities. Whether they’re playing outside all day or lounging indoors, these foods will keep them energized and their taste senses buzzing. So grab your aprons (or bowls!), get the kids involved, and prepare to make some summertime classics!
1. Homemade Fruit Popsicles
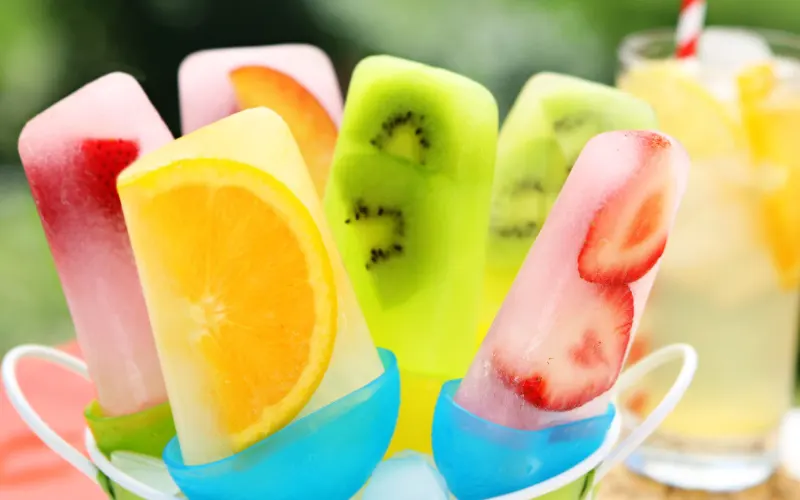
Homemade genuine fruit popsicles prepared with mixed berries, orange juice, and creamy cashew milk. Plus a few ideas to try: peaches, coconut, strawberry, lemon—take your choice and have some tasty fun while remaining cool in the summer heat.
Because they are superior to anything found in a box, of course! No artificial coloring, no processed sugars, just real fruit, plant milk and some maple syrup if you prefer an extra touch of sweetness. I enjoy the combination of sweetness and acidity from the citrus, so I always add a drizzle of maple. Technically, a frozen smoothie that resembles a dessert for all life stages: from toddlers to teens to adults, everyone is satisfied!
Preferred Fruits For popsicles:
- Peach Strawberry Popsicles
- Coconut Lime Popsicles
- Mango Pita ya Popsicles
- Blackberry Mint Mojito
- Raspberry Peach
How To Make Popsicles Without Popsicle Maker:
The quickest and most handy method to make a batch of popsicles at any time is with reusable molds. However, you may be creative and reuse anything from around the house.
- Paper or Plastic Cups
- Large ice cube trays.
- Use small loaf pans and empty yogurt containers.
How To Store Popsicles:
- Unmold the popsicles or “palettas” by submerging them in warm running water for approximately 20 seconds, or until they are easy to wiggle out of the mold. Store them in a freezer-safe container between sheets of parchment paper for up to a month.
- To avoid popsicle drips on a hot day, use paper cupcake liners with a slit at the bottom and insert the popsicle stick through them. It will collect all of the sticky droplets before they reach your flooring or worse, your carpet. You’re welcome, kids.
Popsicles are:
Healthy, refreshing.
Quick and easy to make, really tasty, homemade, vegan.
2. Veggie Stick With Hummus
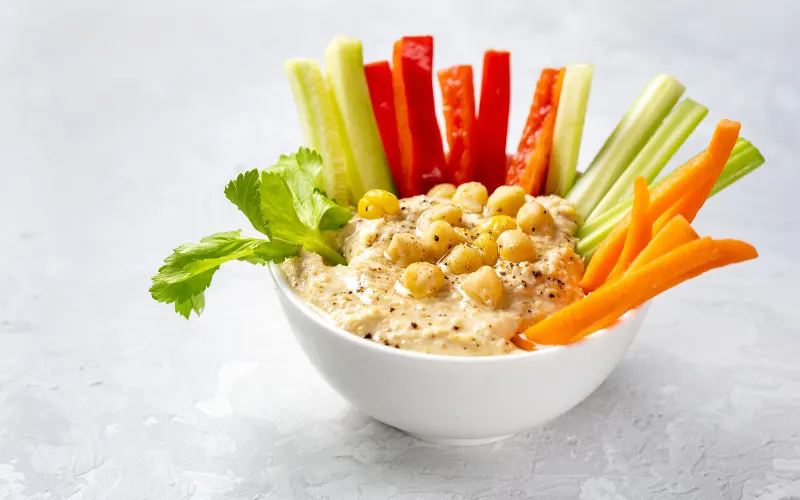
These simple hummus and veggie snack jars make it easy to prepare nutritious snacks for the week! They’re ideal for grab-and-go, directly from the fridge shelves These snack jars are exactly what they appear to be: a simple method to prepare a nutritious hummus and vegetable snack that is pre-chopped, pre-dipped, and portable! Whether with homemade hummus or your favorite store-bought kind, this simple snack prep approach will make raw vegetables delightful and convenient… which means you’ll eat more veggies, right?.
Ingredients:
- Bell pepper
- Celery
- Carrots
- Cucumber
Instructions:
This one’s directions are as straightforward as they get! If you want to create your own hummus, you may need to go the additional mile, but otherwise, it’s just a question of chopping and assembling.
Carrots, cucumbers, celery, and bell peppers diced on a bamboo cutting board next to a dish of hummus and chef’s knife.
Cucumbers, carrots, celery, and bell peppers should be cut into 4 inch long sticks (or whatever size fits your container).
Four hummus and vegetable jars on a grey and white background.
Scoop hummus into the bottom of each jar and add a variety of vegetables. Don’t be frightened to put your vegetables together!
Place the tops on your jars and refrigerate until ready to eat.
Four hummus and vegetable jars resting on the sides, on a gray and white tabletop.
Tips:
Wide mouth mason jars work best for these hummus and veggie snack jars, but you can also use a shorter container and cut the veggies shorter. The whole idea is to have a layer of hummus in the bottom and veggies dipped into it. This could definitely take the shape/form of other containers that you have on hand!
Substitutions And Variations:
Dipping vegetables isn’t limited to hummus.
Hummus – Use your favorite hummus and whatever is simplest to prepare, whether homemade or store-bought! In the images, I used a lemon dill hummus that we recently cooked at home, but we also enjoy roasted red pepper hummus.
Avocado mash (or guacamole) is a great dip for vegetables. I normally mash some avocado with lemon juice and coarse salt to make a simple avocado mash vegetable dip. The lemon also helps prevent the avocado from turning brown for a few days! The only problem is that it will turn brown rapidly, even with the lemon juice… so eat up!
Your favorite dip! – Seriously, choose your favorite healthy vegetable dip, whether homemade or store-bought.
3. Frozen Grapes
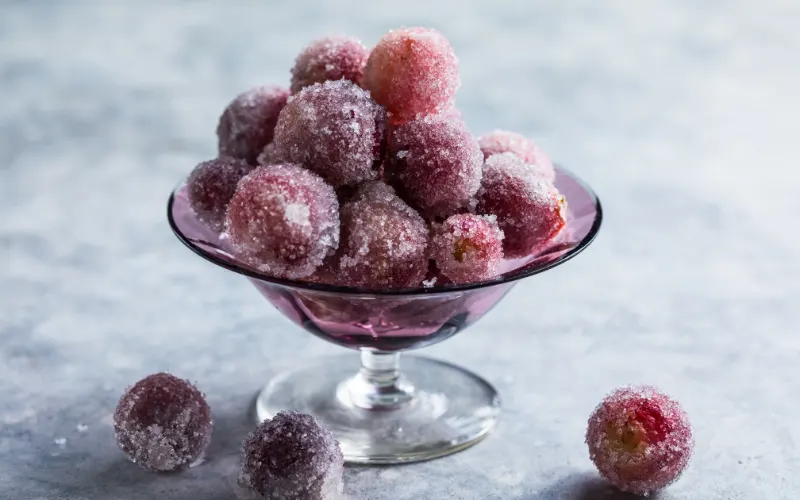
Frozen grapes could not be easier to produce. Keep a stockpile in the freezer for a tasty and refreshing snack. Alternatively, blend grapes into smoothies or puree them to produce a delicious grape sorbet.
If you’ve never tried frozen grapes, you’re in for a treat! Reasons to enjoy this delectable snack include…
- Easy to Make (5 minutes of preparation time, and the freezer handles the rest for you);
- A Healthy Frozen Snack. (Freezing increases the sweetness of the grapes and gives the insides a sorbet-like texture.)
- Ice Cube Replacement (Need to chill down a drink and have ran out of ice? A few frozen grapes will do the trick.
- Store well (they will be eaten before they decline in quality).
Type Of Grapes To use:
- COLOR: Green, red, and black grapes all freeze nicely, so choose your preference.
- SEEDLESS: Use seedless grapes or take off the seeds from seeded grapes before freezing.
How To Make Frozen Grapes:
- Remove grapes from stem – Gently remove the grapes off the stem, eliminating any mushy or damaged grapes.
- Wash Grapes: Place the grapes in a colander and rinse with cold water.
- Dry grapes – Using a clean dishtowel, gently pat them dry.
- Freeze – Place the grapes in a freezer-safe container or zip lock bag.
Are Frozen Grapes Safe For Children?
Children under the age of four should not consume entire grapes. Before freezing, cut the grapes lengthwise and quarter them. Allow them to soften somewhat before serving. Even older children occasionally eat too rapidly, without chewing their food. (Parents must make the decision on this.) The safest approach is to cut the grapes lengthwise (or bend them to produce sorbet).
Storage Instruction:
Freeze in an airtight container for up to three months (but they won’t last that long!) Enjoy frozen grapes; defrosted grapes have an unusual feel.
4. Yogurt Parfait
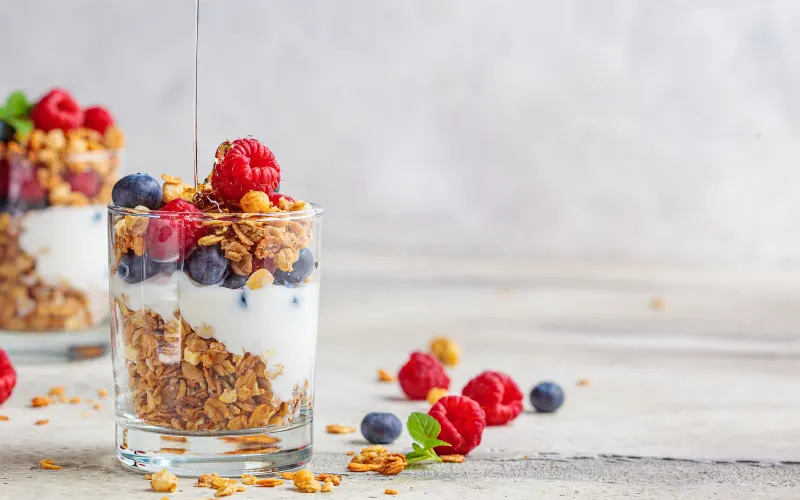
Change up your breakfast routine with these healthful (and fun!) Yogurt Parfaits. These 10 taste combinations are simple, nutritious, and endlessly customizable, with a healthy balance of protein, probiotics, complex carbs, and fruit.
Yogurt parfaits are referred to as “yogurt sundaes” in our family, and while my children are aware that this is ice cream, they like the concept anyway! This is a delightful way to serve yogurt, which contains calcium, protein, and probiotics.
This is a simple dish that many youngsters would gladly assist assemble on their own.
Ingredients will be Needed:
Yogurt parfaits are referred to as “yogurt sundaes” in our home, and while my children are aware that this is ice cream, they enjoy the concept! This is a delicious way to serve yogurt, which provides calcium, protein, and probiotics.
This is a simple recipe that many children would gladly help prepare on their own.
Instruction to Make:
Here’s how to prepare this dish. Scroll to the bottom of the post for further information.
- Determine which fruit to utilize.
- Determine which toppings to use.
- Spread a layer of yogurt on the bottom of a small container or dish. Garnish with fruit.
- Top with a bit additional yogurt.
- If desired, add a layer of seeds to prevent the topping from becoming soggy.
- Add a crunchy topping.
TIP: You may add as much or as little of each layer as you want, but I prefer twice as much yogurt as the fruit and topping layers. Make any adjustments you want!
Tips for Making Best yogurt parfait:
- Use plain whole milk yogurt, such as Kalona’s Super Natural.
- Add a layer of seeds or coconut between the yogurt and the topping to keep it from becoming mushy.
- This dish may be made with either ordinary or Greek yogurt.
- Fruit options include fresh or frozen and thawed berries, sliced mango, applesauce, roasted apples, and chia jam.
- Granola, little animal crackers, low-sugar cereal, or broken up graham crackers may all be used to create a crunchy coating.
- If you intend to preserve them for longer than 4 hours, place the crunchy topping in a separate container and then combine it with the rest of the ingredients when ready to serve.
- Allow the kids to assist determine which ingredients to use and create their own!
- You may also enjoy Fruit on the Bottom Yogurt, Banana Yogurt, Yogurt Melts, and Yogurt Muffins.
5. Watermelon Pizza
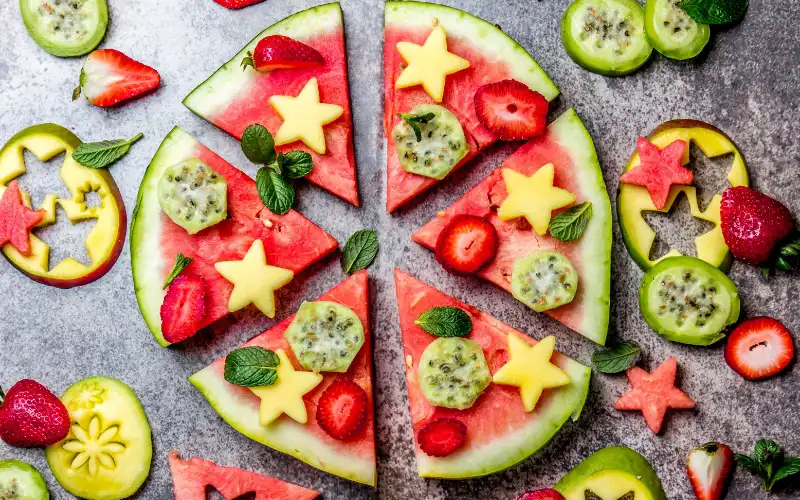
Watermelon Pizza is the ideal enjoyable snack for your children. It’s refreshing, healthful, fast to prepare, and tasty.
This is more of a concept than a recipe, but I believe ideas such as this watermelon pizza are ideal for parents. Food is often more appealing to children when served in a unique way. Making a simple piece of melon into a delightful snack brightened Finn’s day!
- Watermelon pizza is quite simple to make. Start with the pizza foundation (a slice of watermelon) and cut it into wedges. Next, top each slice with your preferred pizza topper (fruit). Finish with cheese (a sprinkling of shredded coconut). Finally, enjoy, but remember to save some for the kids!
- Watermelon pizza is a pleasant, enjoyable, and nutritious snack or dessert for children. Allow the youngsters to select their toppings.
This is an excellent snack for getting kids involved in the kitchen; they can assist prepare the toppings and then design their own watermelon pizza. I enjoy interactive food activities like this. I am certain that the more children are involved in all aspects of their eating, including meal planning, grocery shopping, and food preparation, the more accepting of new foods they will be.
6. Cucumber Sandwiches

We’ve had to get inventive lately to use up all of our homegrown cucumbers! We’ve been cooking this Cucumber Avocado Salad frequently, as well as my new favorite Japanese Cucumber Salad. But, honestly, I was getting bored with salad and wanted to try cucumber in something different, so I made Cucumber Tea Sandwiches!
These sandwiches are thought to have originated in England in the 1800s as a high-society snack served before dinner. They are still popular all around the world for special events, get-together, picnics, and afternoon tea!
Ingredients for Making Cucumber Sandwiches:
- Brioche bread with the crust removed is ideal for this dish. It’s soft, fluffy, and full of taste! Use your favorite thin-sliced white bread. To make this somewhat healthier, use white whole wheat bread.
- I like English cucumber since the seeds are smaller, but any variety of cucumber would work for this dish. Simply slice them pretty thin! If you don’t like seeds, you can scoop them out with a spoon.
- Cream cheese provides a rich and delicious taste to these sandwiches. Make careful to avoid Neufchâtel and light cream cheese. Not sure what the difference is between Neufchâtel cheese.
- Add your preferred mayonnaise to the cream cheese mixture to make it lighter.
- Grated parmesan cheese provides natural saltiness and taste.
- Herbs (fresh dill, parsley, and chives): The herbs are what we want to highlight in the sandwich. I enjoy adding fresh herbs in this recipe since it enhances the flavor. If you only have dry, replace 1 tsp dried with 1 tbsp fresh.
- Lemon juice and zest provide a bright, refreshing flavor that compliments the cucumber.
- Granulated Garlic and Onion: Dried garlic and onion offer a rich, delicious taste.
- Add salt and pepper to taste.
How to Make Cucumber Sandwiches:
Combine cream cheese, mayonnaise, Parmesan cheese, dill, parsley, chives, lemon juice, zest, granulated garlic, and onion; mix until smooth. Season with salt and pepper to taste.
Spread mixture on bread: Spread about a spoonful of the cream cheese mixture onto each slice of bread.
Top with cucumber slices: Place the cucumber slices on the toast. Place one sandwich on top of the other, then cut each into four pieces.
Serve Cucumber Tea Sandwiches immediately, or wrap firmly in plastic wrap and refrigerate for up to 24 hours.
7. Yummy Frozen Yogurt Bites
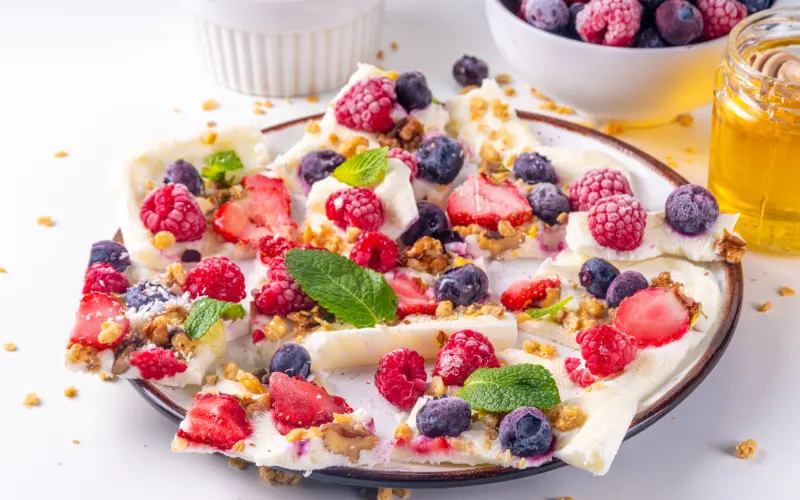
Frozen yogurt bites are a nutritious and delightful snack for kids that can be prepared in minutes with simply yogurt and optional toppings such as fresh fruit, micro chocolate chips, or multicolored sprinkles. These delicious frozen desserts are an excellent way to encourage youngsters to consume more dairy and fruit while also fulfilling their sweet craving. This is also a wonderful activity that parents and children may enjoy together!
Ingredients Supplies needed:
- Any flavor of yogurt.
- Preparation materials include a small sheet pan or tray for freezing, parchment paper, a plastic bag for piping, and optional toppings.
How to Make Yogurt Bites:
- Cover a small sheet pan or tray with parchment paper. Make sure the tray you chose fits in your freezer!
- Next, fill a piping bag or plastic sandwich bag with yogurt and cut a tiny hole in the corner.
- Pipe bite-sized blobs of yogurt onto the prepared pan. Keep in mind that they will flatten out little by the time they reach the freezer, so try to leave some space in between.
- To make the yogurt more colorful and entertaining, add extra toppings like sliced strawberries, miniature blueberries, sprinkles, or little chocolate chips.
- Place the pan or tray in the freezer for two to three hours, or overnight. I’ve never covered mine, and they come out great.
8. Smoothie Bowls
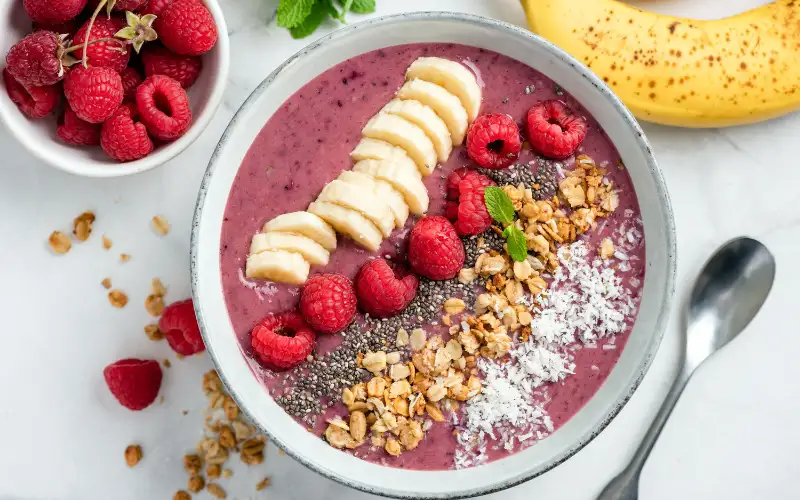
I’m constantly searching for fast, easy snacks that my kids would enjoy, and while we keep a cache of store-bought alternatives on hand, I enjoy mixing in some homemade options. This Smoothie Bowl has been a big favorite with my two tiny kids (who are two and five years old as I write this), especially as they like adding their own toppings.
What is Smoothie Bowl:
Okay, if you are unfamiliar with this concept, here is a simple explanation. It’s essentially a smoothie in a bowl that you consume with a spoon. (It’s similar to the Acai Bowl fad, which you’ve seen at coffee shops and smoothie stores.) They’re a very great method to modify how we serve smoothies—it’s completely feasible that a youngster may just like it this way.
Ingredients You Need:
- Frozen strawberries or other frozen fruit.
- Banana: This is ideal when extremely ripe, and it can be fresh or frozen.
- Milk, either dairy or non-dairy, works.
- Add your favorite toppings, like granola, berries, bananas, and sprinkles.
Step by Step Ingredients:
- Combine the ingredients in a blender.
- Blend on low and gradually increase to high speed, using the stick that came with your blender, if you have one.
- Pour or spoon into bowls, then top with chosen toppings.
9. Apple Nachos
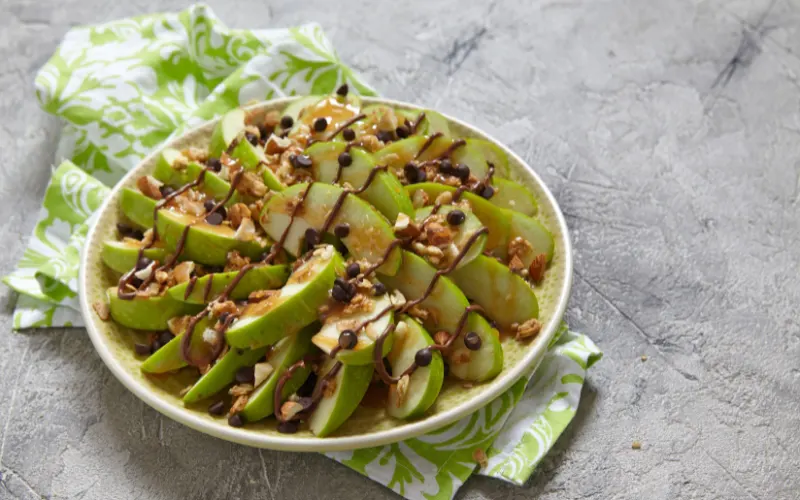
Apple nachos are a fun and healthy snack that kids will love. They’re perfect for a summer afternoon treat, and they’re so easy to make that even kids can help out in the kitchen.
Here’s what you’ll need:
- Apples (any variety you like)
- Nut butter (peanut butter, almond butter, or sunflower seed butter)
- Toppings (chocolate chips, granola, dried fruit, shredded coconut, chopped nuts)
Instructions:
- Wash and slice the apples thinly. You can use a mandoline slicer to get them really thin, or just slice them by hand.
- Arrange the apple slices on a plate in a single layer.
- Melt the nut butter in a microwave-safe bowl for 10-15 seconds, or until it’s thin enough to drizzle.
- Drizzle the melted nut butter over the apple slices.
- Add your favorite toppings.
Here are some ideas for toppings:
- Chocolate chips
- Granola
- Dried fruit (raisins, cranberries, chopped apricots)
- Shredded coconut
- Chopped nuts (almonds, peanuts, walnuts)
- Mini marshmallows
- Caramel sauce (for a special treat)
Tips:
- To prevent the apple slices from browning, you can toss them in a bowl with a little bit of lemon juice.
- If you don’t have a microwave, you can melt the nut butter in a small saucepan over low heat.
- Get creative with your toppings! Let your kids help you choose their favorites.
- Apple nachos are best served immediately. However, if you need to make them ahead of time, you can store them in the refrigerator for up to a few hours.
Apple nachos are a great way to get kids to eat more fruit. They’re also a healthy and satisfying snack that will keep them full until their next meal.
10. Trail Mix
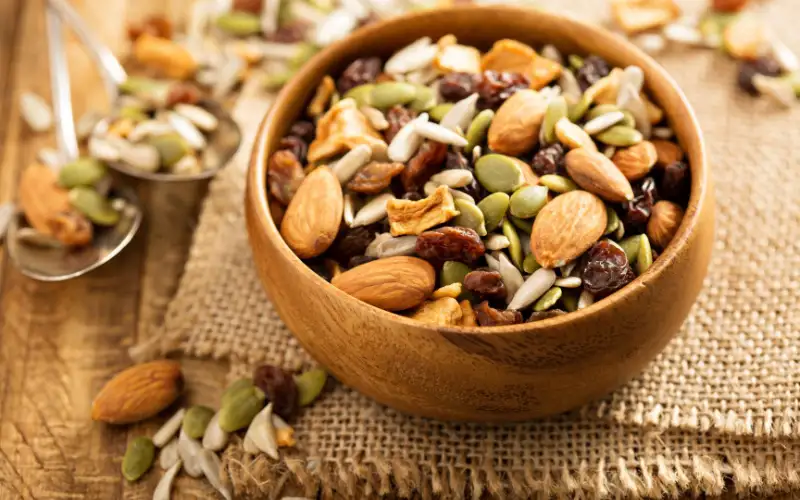
Trail mix is a perfect healthy snack for kids in the summer. It’s portable, customizable, and packed with nutrients that will keep them energized for all their outdoor adventures. Here’s what you need to know to create a trail mix that’s both kid-approved and nutritious:
Ingredients:
- Dry fruits: A great source of natural sugars, fiber, and vitamins. Popular options include raisins, cranberries, cherries, apricots, and mangoes.
- Nuts and seeds: Provide healthy fats, protein, and fiber. Be mindful of allergies and opt for chopped nuts like almonds, cashews, or peanuts for older kids. Pumpkin seeds and sunflower seeds are also great choices.
- Whole grains: Add some complex carbohydrates for sustained energy. Cheerios, Kashi Go Lean Crunch, or even popcorn are all good options.
- Sweet additions: A little bit of indulgence can go a long way. Chocolate chips, yogurt chips, or peanut butter chips can be added in moderation for a sweet treat.
Tips:
- Let your kids help choose the ingredients. They’ll be more excited to eat a snack they helped create.
- Make it a colorful mix. A visually appealing snack is more inviting.
- Portion it out. This will help with moderation and prevent overeating.
- Store it in an airtight container. This will keep your trail mix fresh and prevent the ingredients from getting soggy.
With a little planning, you can easily create a trail mix that’s both healthy and delicious for your kids to enjoy all summer long.


[…] some, a light snack before a workout can provide much-needed energy. Opt for complex carbohydrates like fruits or […]